
Living in a two bedroom Victorian terrace, it was inevitable that our children would end up sharing a bedroom at some point and when we found out that baby number two would be a baby… More

A British Interior and Lifestyle Journal
Living in a two bedroom Victorian terrace, it was inevitable that our children would end up sharing a bedroom at some point and when we found out that baby number two would be a baby… More

Being an outdoorsy family, we love nothing more than getting out for a good hike at the weekend, especially if the weather is good! We’ve been stuck in recently because of Beans bad knee and… More

At 40 weeks +5 I had a check up with my midwife booked and the week before we had discussed potentially having a sweep if I hadn’t started laboring naturally in the mean time. I… More


")


")


Where is it from?
When I suggested creating my own floral centerpieces for my wedding…everyone thought I was mad. I’m not going to lie I think I was a little naive thinking that it would be easy. It’s a decision that you have to make and stick with as you have to order the flowers in advance and collect them (at the latest) two days before. So, there’s no time to change your mind and find a last minute florist to throw together 9 beautiful displays! The main reason I wanted to make the displays myself was ultimately to save money but also for me the flowers were the main part of the wedding and as I am a big lover of flowers… I really wanted to create my own vision of blooming prettiness.
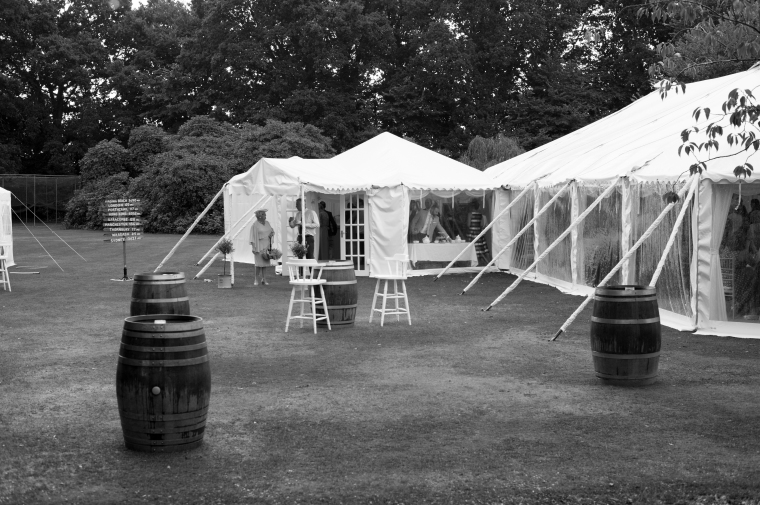
Our wedding reception was held in a marquee. The lovely thing about using a marquee instead of a hotel is that every part of the style and decoration is down to you. From lighting to chairs, round tables to trestle tables, it is completely up to you depending on your vibe and budget. Our vision was an elegant understated decor filled with beautiful wild flowers… soft, pastel hues with lots of eucalyptus. As we wanted the flowers to be the focal point… we bought a selection of simple white and baby pink paper lanterns to fill the ceiling.

I wanted the flowers to tie in with my bouquets so we had to roughly work out how many stems of each flower we would need per display and order them through a wholesale florist about 2 weeks before ready to collect on the Thursday afternoon.

I had made one practice display from a few bunches of flowers from Tesco and I found that odd numbers of flowers looked better than even and I also found they worked best with just a few main large flowers and more of the smaller flowers and greenery to fill the space. So I chose a beautiful soft pink rose called ‘Sweet Avalanche’ and the most amazing pinky/creamy/green Dahlia called ‘Diana’s memory’. I also chose a creamy/white stock (as it’s quite a  big flower and smells absolutely divine), white lisianthus and white spray roses to fill the gaps between the greenery and bigger flowers. For the greenery I wanted the displays to look like they had been freshly cut from a wild country garden so we went for a pretty white astrantia, cow parsley and myrtle. A friend of my mum’s offered their eucalyptus tree to use and they had cut back loads of the prettiest whispy eucalyptus with elegant pointy leaves ready for us to use. We used my mum’s collection of antique white vases to display the flowers in, each of them slightly different sizes and design.
My Dad collected the flowers on Thursday and we kept them in a fairly dark, cool room, in buckets of water, ready to put the displays together on Friday. We also kept the eucalyptus in water as we didn’t want it to be too floppy by Saturday. On Thursday evening we soaked the oasis in lukewarm water so that it was nice and saturated by Friday. Lukewarm water contains less oxygen than cold water and so creates less air bubbles which could block the water uptake of the oasis. It’s tempting to push the oasis down into the water but it’s important that you allow the oasis to soak up the water in its own time, simply place the oasis gently into the water.


It was a relatively early start on Friday morning. We had no idea how long it would take us to put the displays together so my maid of honour Rachel, Sister-in-law Katy and Angela (who works at the venue) helped me (my mum was busy running around the marquee making sure everything was set up correctly). I briefed them on the style I was hoping for… nothing too uniform, lots of greenery and wild and bushy as opposed to tightly packed. Then we were off!
We Started placing the greenery around the bottom of the displays to start with then placed the larger roses and dahlias into position and filled the gaps with everything else. An important tip is to be confident with your flower placement… once you have inserted a stem into the oasis, you can’t take it out again as this will leave a big hole which then can’t be used. I would also advise to not use any flowers with really thick stems as they take up to much space in the oasis. In hindsight, the stems on the stocks were probably too big but as they smell so incredible we went with them anyway!
And that is really all there is too it. We had a few flowers left at the end so put together some little posies as well as some larger jars of flowers to dot around the marquee and I also kept some back to decorate my wedding cake with. It took us about an hour and a half!
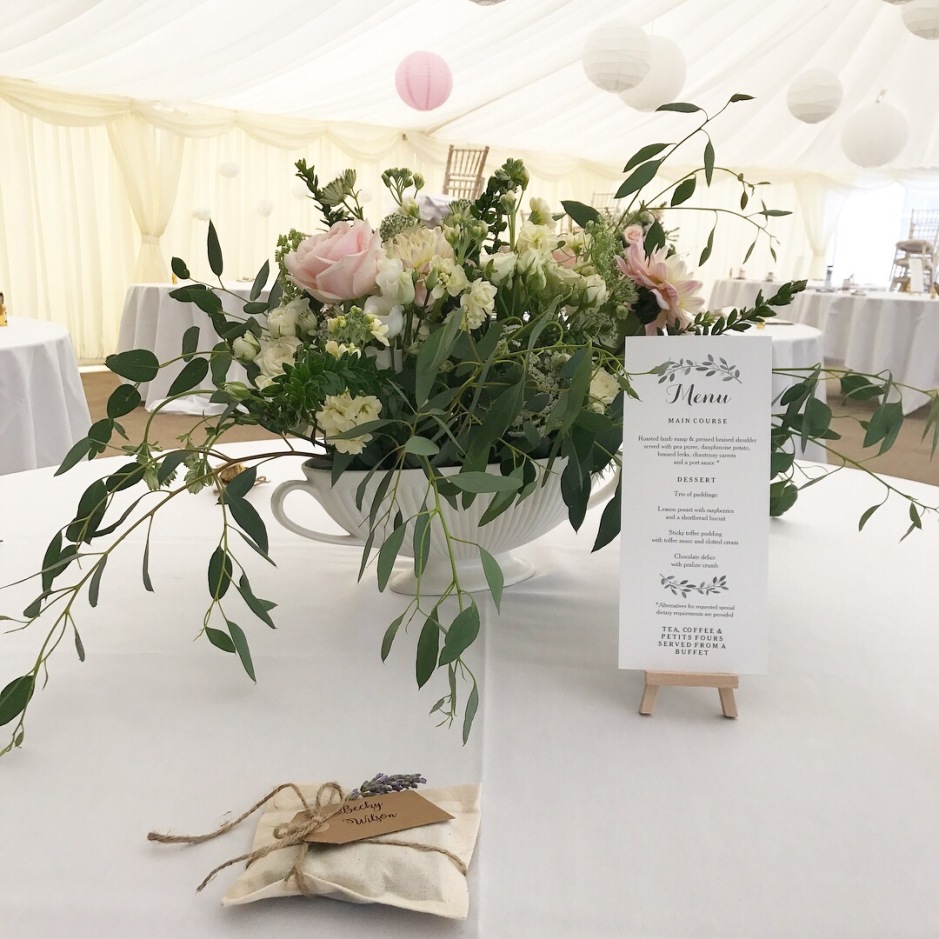
Obviously, we couldn’t put the displays in the marquee until the very last minute so Angela very kindly offered to put them into the marquee on Saturday for us. Before we left the venue on Friday, for the rehearsal at the church, I sprayed the flowers with a gentle mist of water just to make sure they kept nice and fresh. I also filled up the vases with water. And here they are……
I apologise for the terrible photos! Hopefully, my photographer took some nice ones which I will add in later!

Good morning! I feel I should apologise for the lack of blog posts firstly. I took a step back from the blog to get the last little bits of the wedding finalised. The most stressful part being sending out the invitations in a timely manner. I just don’t know where the time has gone. I’m quite a creative person and I was so excited to make my own wedding invitations… although so many people try to dissuade me from doing so because it’s quite time-consuming and stressful but I’m definitely one for getting stuck in, so I decided to give it a go and I have written a blog post about DIY invitations to show you it’s not as scary as you think! So let’s begin….
I decided not to send out save the dates in a bid to save money but at the same time, I had anticipated sending the wedding invitations out a lot sooner so didn’t think that save the dates would be necessary…. oops! Lesson 1: Send save the dates as it will save you from lots of sleepless nights worrying in the future! Anyway, my wedding design was chosen from the beginning. I didn’t have to think about it too much, I knew I wanted something simple and elegant. It’s essential that you have a ‘vision’ of your wedding design and stationary in your head before you start. With all the excitement of the planning, it can be easy to go crazy trying to cram in everything you like from Pinterest; I think picking a theme early on helps keep you grounded and focused and narrows your options which, isn’t necessarily a bad thing. When it comes to the invites, they should give your guests a sneak peek into what to expect on the day without giving too much away. Cue the flat lay….

There are so many wedding invitation websites to choose from, initially, I found it quite daunting. Also, because I had a vision in my head as to what I wanted them to look like, it was difficult to find something to match up to my expectations without being too pricey. I am all for using small/local brands but in the context of wedding planning, everything adds up so quickly so they had to be affordable. I stumbled across Zazzle simply from spending hours searching google. Zazzle is a bit like Etsy but solely for stationary/invitations. What I liked about Zazzle was that I could choose any style and customise it to add my personality. At the same time, if you don’t have a design flair you can leave the design exactly how it comes and just change the words. The problem I had was there were so many to choose from I just didn’t know where to start. I didn’t ever manage to scan through the whole range even with lots of filtering and my specific requirements. The most important thing for me was the style of writing, I soon realised that the colours, paper type etc wasn’t important as these are easily changed. To some extent, you can also change the font but I wanted a calligraphy style design and picking the right one was quite tricky! After much deliberation {Chris wasn’t much help at this stage} I chose a style which had a touch of eucalyptus and pretty calligraphy. I am obsessed with eucalyptus, the d usky colour and the incredible smell but also its such a great flower for wedding bouquets because it goes so well with all flowers. I am hoping to use lots of eucalyptus at my wedding so this design was perfect without giving too much away. My Mum had also ordered a couple of beautiful personalised stamps from ‘The English Stamp Company’ which had a similar
eucalyptus motif and we were hoping to use on the invites in some way so they would match perfectly.
I was ready to order the invites but my Mum suggested buying a sample first just to make sure they looked as good in the flesh, so I chose the design in a few different paper options… they arrived in a few days and they were exactly how they appeared online which was really reassuring. Lesson 2: always order a sample as they can look so different through a computer screen. We ordered the quantity we needed of invitations to the wedding, evening reception, RSVP’s and information cards in a beautiful matte ecru paper you can also choose between a straight or rounded edge; we went for the straight edge. Eventually, we will also order menu cards and other bits of stationary!
 The invitations arrived carefully wrapped just over a week later which I thought was super quick considering they’ve come all the way from the states! The only thing I was disappointed with was the fact that the main envelope was a very slightly different shade of white to the RSVP card envelope {I know, I’m so picky} but that was all that was wrong so just shows the quality.
Last year, I gathered a load of beautiful lavender from my Mums garden… you might remember this from  Instagram. I wanted to use a single stem of dried lavender in my invites as I’m hoping to use lots of lavender on the day! I wanted the whole look to be quite simple so I decided to tie them up with a string twine and I had stamped a load of
  brown paper tags with one of my stamps from the English Stamp Company with our initials and the wedding date; I thought people could stick these to their fridge/ pin to a notice board and that was all there was too it really. I also ordered the most stunning linen ribbon from Caltonberry.co.uk which I decided to use just on the evening reception invitations as there wasn’t enough of it to do the whole lot and I wanted to save some for the wedding favours. I used the linen ribbon to make a ‘belly band’ to hold the invite and information card together. I secured the belly bands with fabric glue and here are the finished products…


They are exactly how I pictured them to be and they are perfect. We had a bit of a delay sending them out as I didn’t want to spoil them with a ghastly red first class stamp so my Mum ordered me a load of lavender stamps… which in the end we couldn’t use because the invitations were too thick to post as a standard letter. Lesson 3. always check whether they will post as a standard letter prior to stamping… luckily we did think if this and rushed to our local post office with one of the finished sealed invitations to check! So, after scanning around trying to find a different stamp suitable for a large letter, My Mum bought a load of brownish/gold 1 pound stamps which looked lovely… I know what you’re all thinking but I just wanted them to look perfect {this is exactly why Mr. everythingellie calls me Angelica; any rugrats fans out there}.
I hope you love them as much as I do! Now the exciting part is receiving all the RSVP’s in the post….
E xx

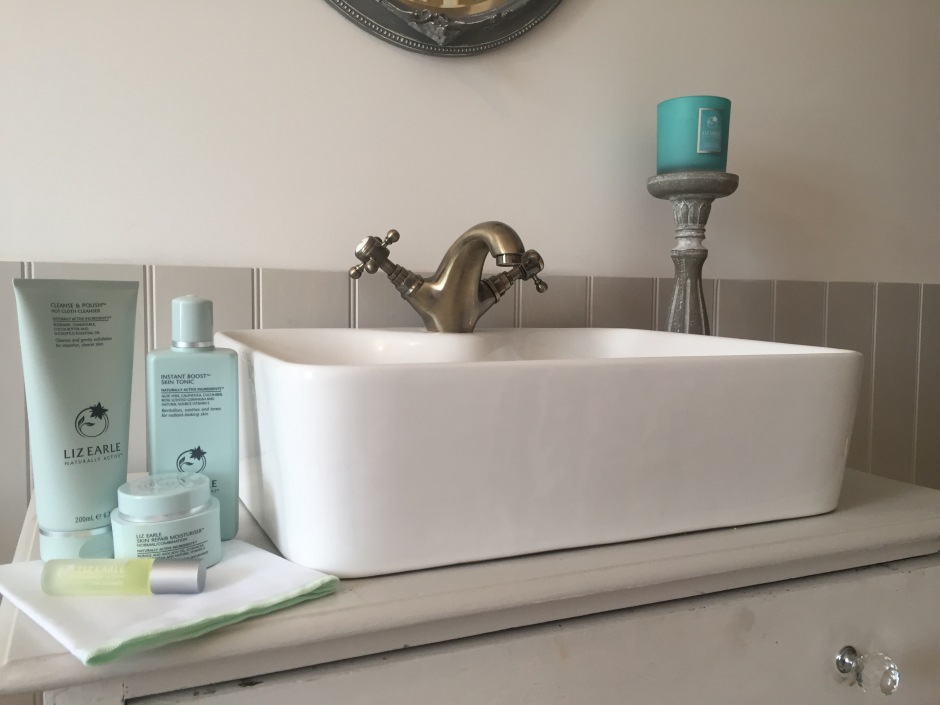
Some might argue that this post has nothing to do with interior… I beg to differ. Not only are Liz Earle products a little piece of magic, bottled; they also look super pretty in the bathroom…

Anyway, I’m not here writing about the packaging, although that’s worthy of a post in its own right; I am sharing my experience of the beautiful British skincare brand and the effect it’s had on my oily, breakout prone skin.
Liz Earle skincare has been around for years {Ask your Grandma, she probably uses it too!} It’s a British brand which adopts the principle “The same today as they were on day one”. To me, that means Team Liz Earle are so confident in the ingredients they use, there is no need to change! Liz Earle uses beautiful natural essential plant oils in their products and never test any of their products on animals {leaping bunny, free to leap}. All their products are also suitable for vegetarians!
I was recommended Liz Earle by a lovely friend of mine after a moan about my breakouts and problem with my oily skin. She told me that If I ordered the ‘Liz earle essentials’ online I would get a full size free product as well as a handful of samples {with free delivery} so it’s a great affordable way to try it out! This was about a three years ago, and until only recently, I have used the stuff day and night, religiously. I think it’s im portant to say, I try to have a fairly decent diet {I am writing this whilst tucking into my scrambled egg and avocado breakfast}, I exercise a bit {although, not excessively}; I could perhaps drink more water during the day but that can be quite difficult when I am not always guaranteed a break at work and can’t keep my water bottle in reach because of infection control {Blah, Blah, Blah}. Anyway, what I am trying to say is I know the importance of a healthy lifestyle on the skin!
I ran out of my last essentials before Christmas and with every last penny to my name going on the house renovations plus Christmas presents I just didn’t replenish my stock. I wouldn’t say Liz Earle is disastrously expensive but at the same time, it was at the bottom of my list of priority items. My skin has been terrible since December, I had blocked pores, breakouts my skin was dull, I had a very oily T-zone and dry cheeks and eyes. I put it down to the dry cold weather UNTIL I stocked up on Liz Earle again…
The Liz ear le essentials comes in a three step routine. Cleanse and Polish Hot Cloth Cleanser, Instant Boost Skin Tonic and Skin Repair moisturiser. There is also a Superskin essentials routine for more mature, dry skin {I will talk about the wonder that is Superskin a bit later}.
The multi award winning Cleanse and Polish Hot Cloth Cleanser is a smooth creamy cleaner which comes with a pure cotton cloth to gently exfoliate the skin and buff away dead cells. The smell of eucalyptus and rosemary is heavenly, it’s so refreshing and not overpowering at all, it’s just enough to leave you wanting more! Cleanse and Polish truly leaves my skin so soft and clean; It removes make up so easily {I use Estee Lauder Double wear foundation which is notoriously difficult to wash off}. I use about a 20p size amount and that’s enough to cover my face and neck and remove mascara and foundation. I pat dry my face with a towel and then apply a small amount of the Instant Boost skin tonic to a cotton wool pad and wipe it across my face {It removes any excess make up and stops the skin feeling tigh}; It’s like splashing my face with cucumber juice {is that a thing?}. I was sent a sample of the Instant boost skin tonic spitzer once and I’ve kept the little handbag sized bottle which I keep topped up and so It’s always to hand if I need an extra boost of cucumber throughout the day! It’s also great for when I run out of cotton wool pads! Now, here’s the best bit… Once the skin tonic is dry, I apply a small amount of the Skin Repair moisturiser for normal/combination skin. The moistursier comes in three types dry/sensitive skin, normal/combination and light combination/oily. I would say my skin is more combination/oily but the light moisturiser only comes in a 50ml pump bottle and I prefer the 50ml jar so I use normal/combination instead (PLEASE MAKE A COMBINATION/OILY JAR LIZ!!). My skin feel so clean and soft after applying the moisturiser I almost don’t want to apply any makeup afterwards {almost, HA!}.
Now, for Superskin… My mum uses the Superskin Moisturiser, however, I find this a bit too heavy for my own skin type. As a compromise, when my skin is in desperate need {after a long shift when my skin feels tight and dehydrated} I apply a tiny a mount of Superskin Concentrate Rollerball to my fingers and mix it with my Skin Repair Moisturiser; I apply it at night just before I climb into bed. Superskin Concentrate is made from 100% pure plant oils and the smell is just devine! Ingredients include, avocado oil, argan oil, vitamin E, Neroli, lavender, hazlenut oil and more, it is literally magic, bottled! I have naturally oily skin but my skin drinks this oil concentrate and by the morning my skin feels and looks glowing! If I was only allowed to use one skin product for the rest of my life it would be this! Added bonus, the fragrance sends me straight to sleep!
I Just had to share my Liz Earle secret; since I’ve started using Liz Earle again, my skin is back to being soft, glowing and lovely! You must give Liz Earle a try, I promise you won’t be disappointed. This month there’s loads of freebies to choose from! Let me know how you get on!! xx

P.s If like me, you’re obsessed with the signature Liz Earle Fragrance, you must buy this A-MAZING candle! It’s to die for!
It’s been an awfully long time since my last blog post and I promised myself then that I would keep up to date with my posts… well here I am again with the same sentiment; this time I’ve bought a diary so clearly I mean business {rolls eyes}.
I’ve been a busy bee over the last couple of months. Trying to get everything booked for the wedding, renovating a bathroom and working my butt off to pay for it. I’m trying my best to remember to enjoy it along the way! One of my New Years resolutions was to be more organised, hence the diary {#winning}.
So, project bathroom update… we are doing most of the work in here ourselves {by ‘we’ I mean Mr. EverythingEllie}, with a little help from our plumber, who’s only job was to plumb in the new radiator but has also helped us plan out all the new plumbing, and when we’ve needed bits and bobs he’s dropped off surplus materials for us to use! If all tradesmen were as genuine and honest as him the world would be a better place!!
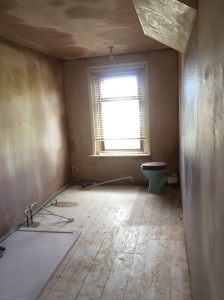
The first job was getting the whole bathroom replastered, the plaster was in such a bad condition with massive cracks after the side return extension so it all had to be knocked off and completely re done. We also had artex on the ceiling which needed covering up. Once the plaster was dry we painted the whole room white. I love the idea of having a colour on the walls but i’m so indecisive I know I will change my mind once it’s done. So white seemed like the safe option.

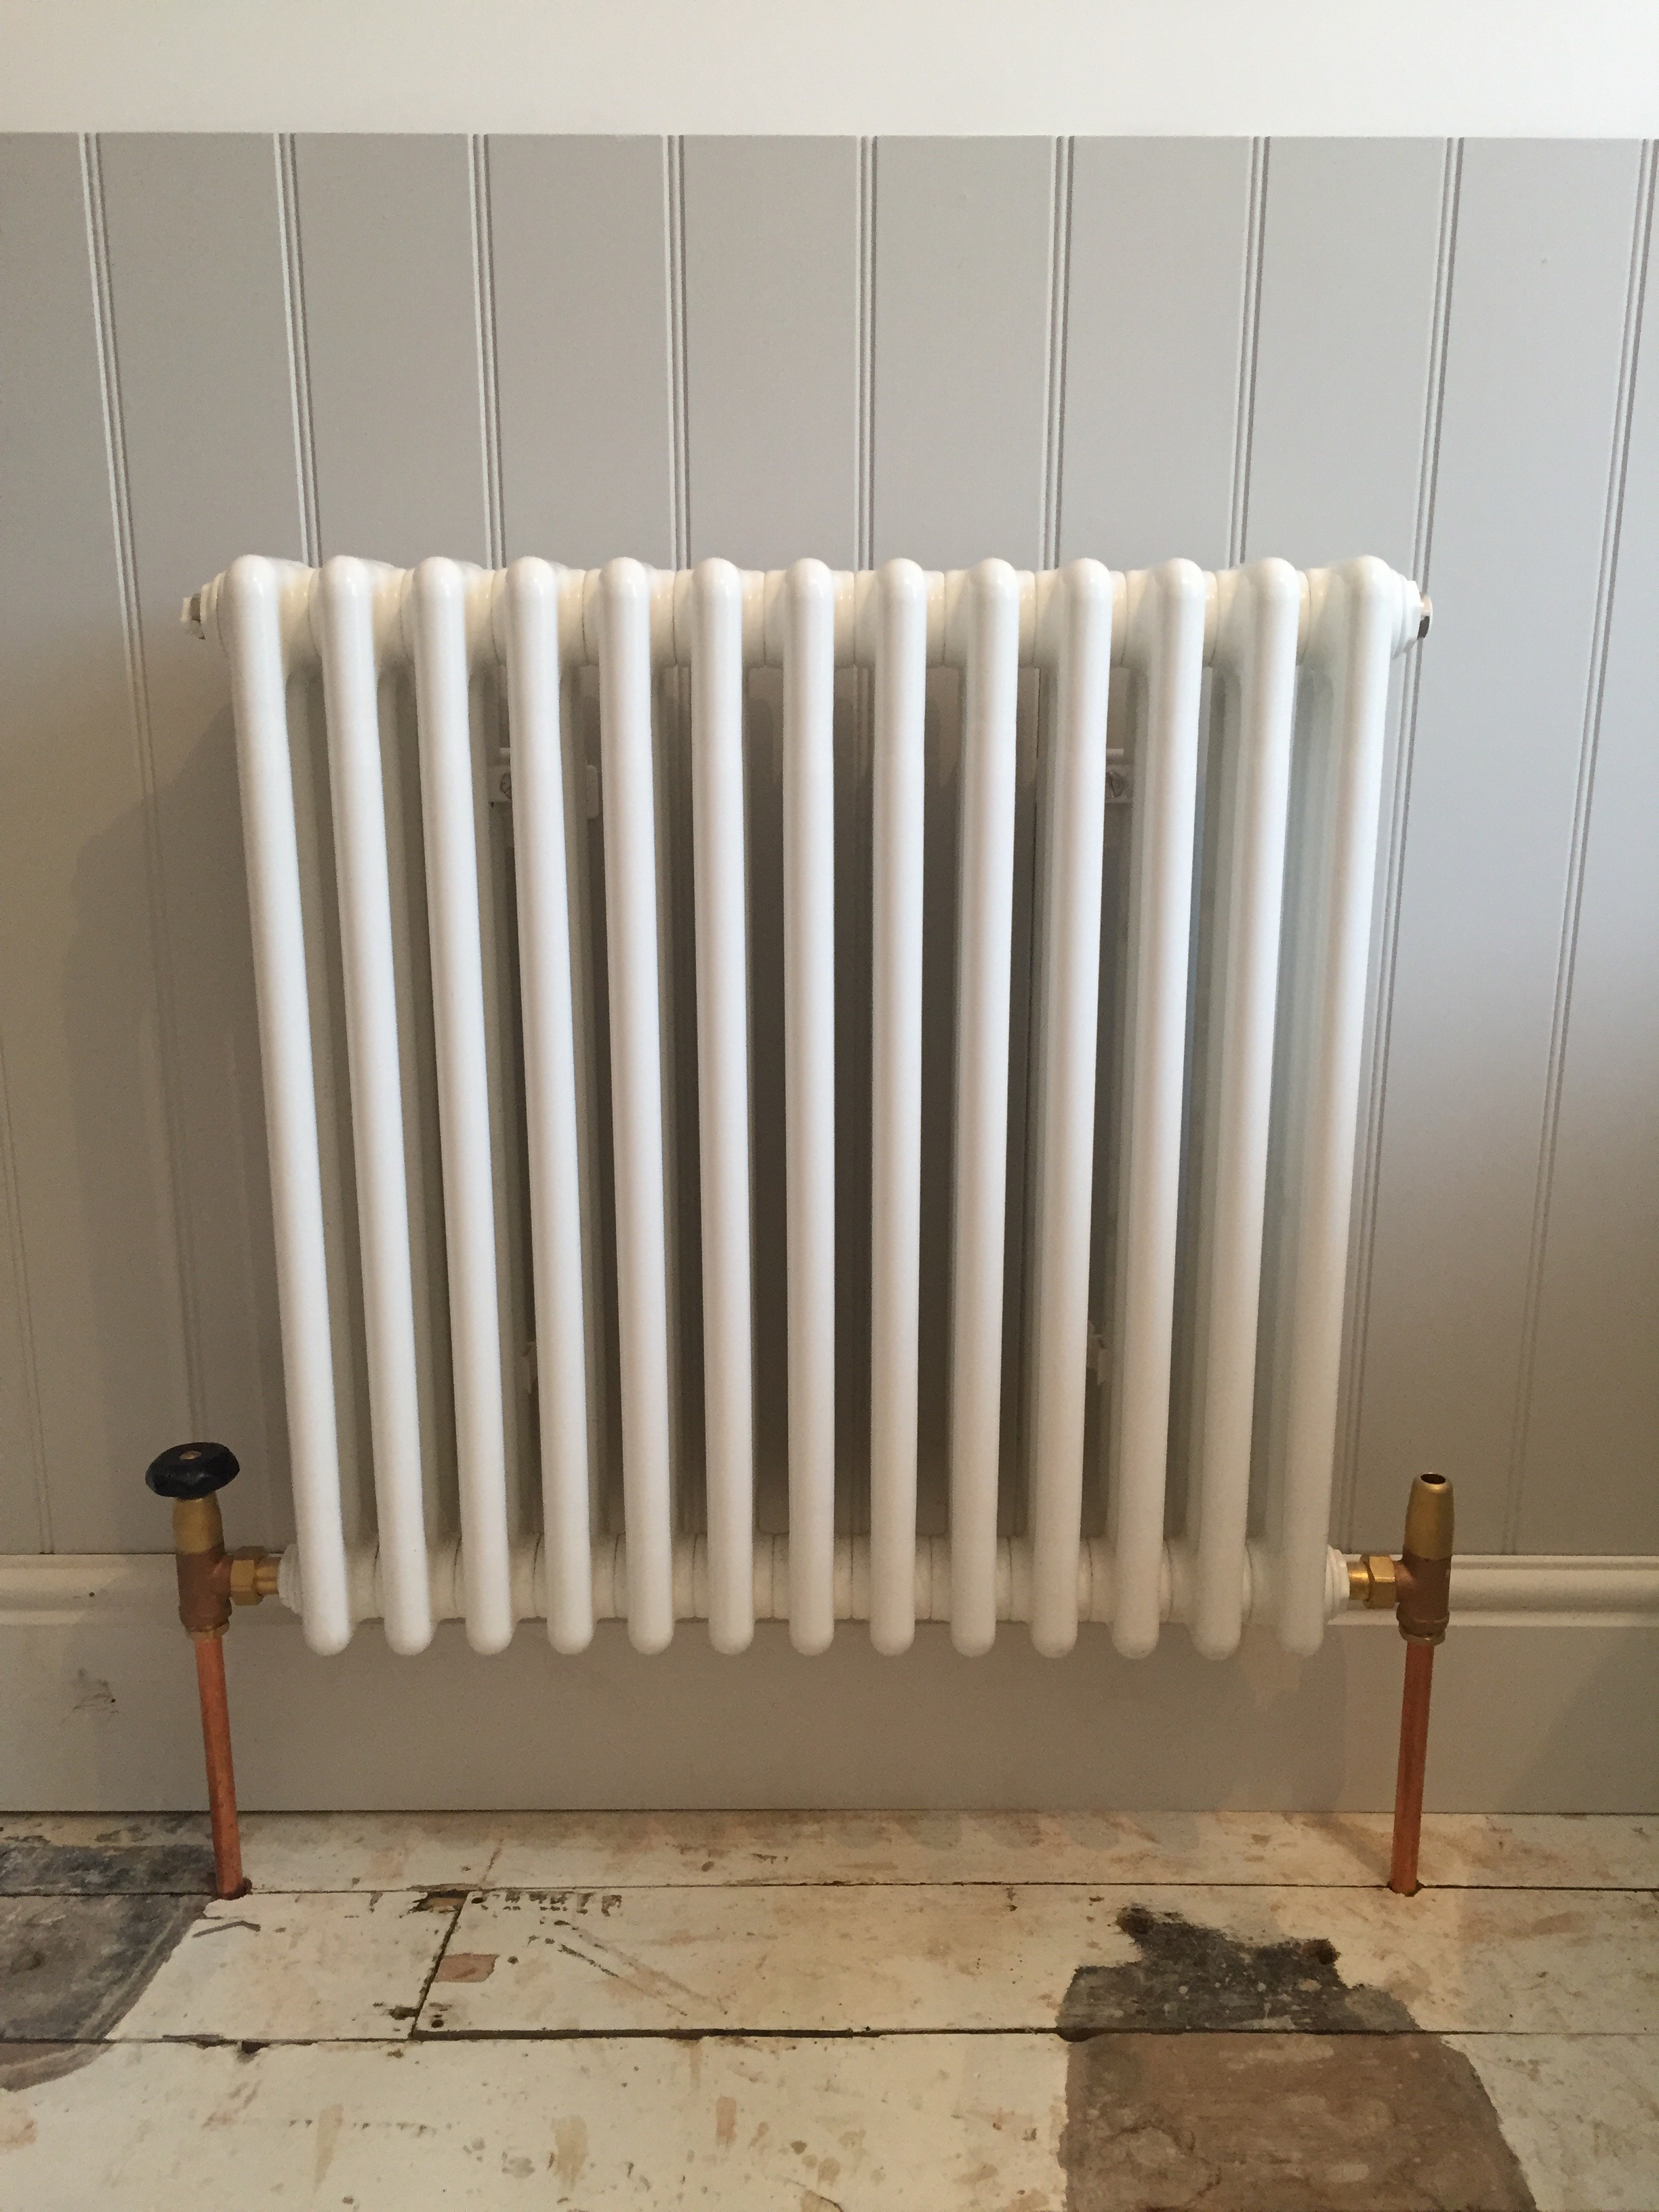
We added tongue and groove paneling around the bottom half of the walls with the idea of having a little shelf running around the whole bathroom but we can’t seem to find small enough wall brackets to hold the shelf up. So that idea is on hold while we think about what to do instead. We have painted the paneling Cornforth White by Farrow and Ball and it looks AMAZING!


Once the paneling was up and painted the plumber Ken came to fit the new radiator, he helped us find brass TRV’s as we felt chrome {like the rest of the house} would spoil the look of the room. They look so nice and make the new radiator look like an original!
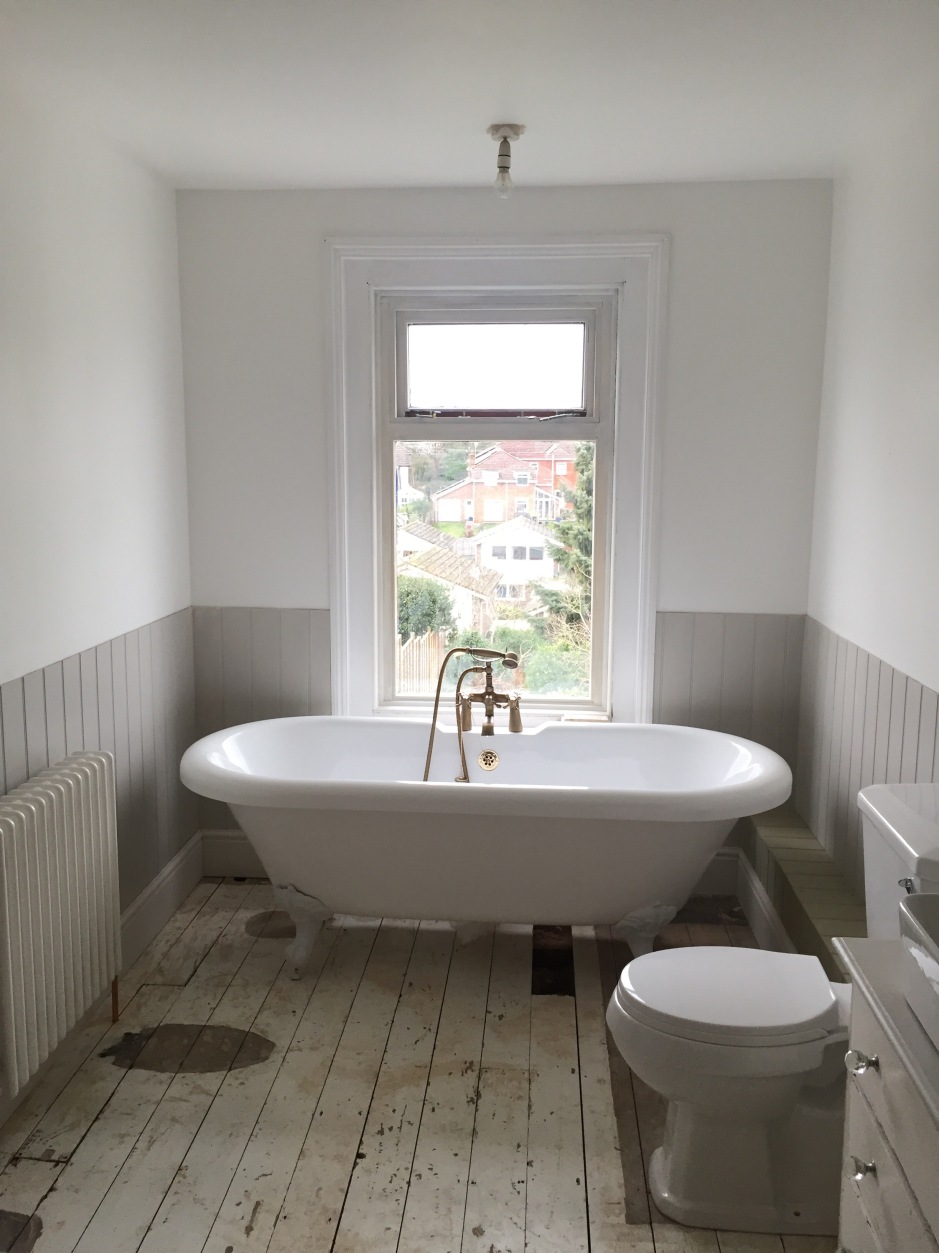
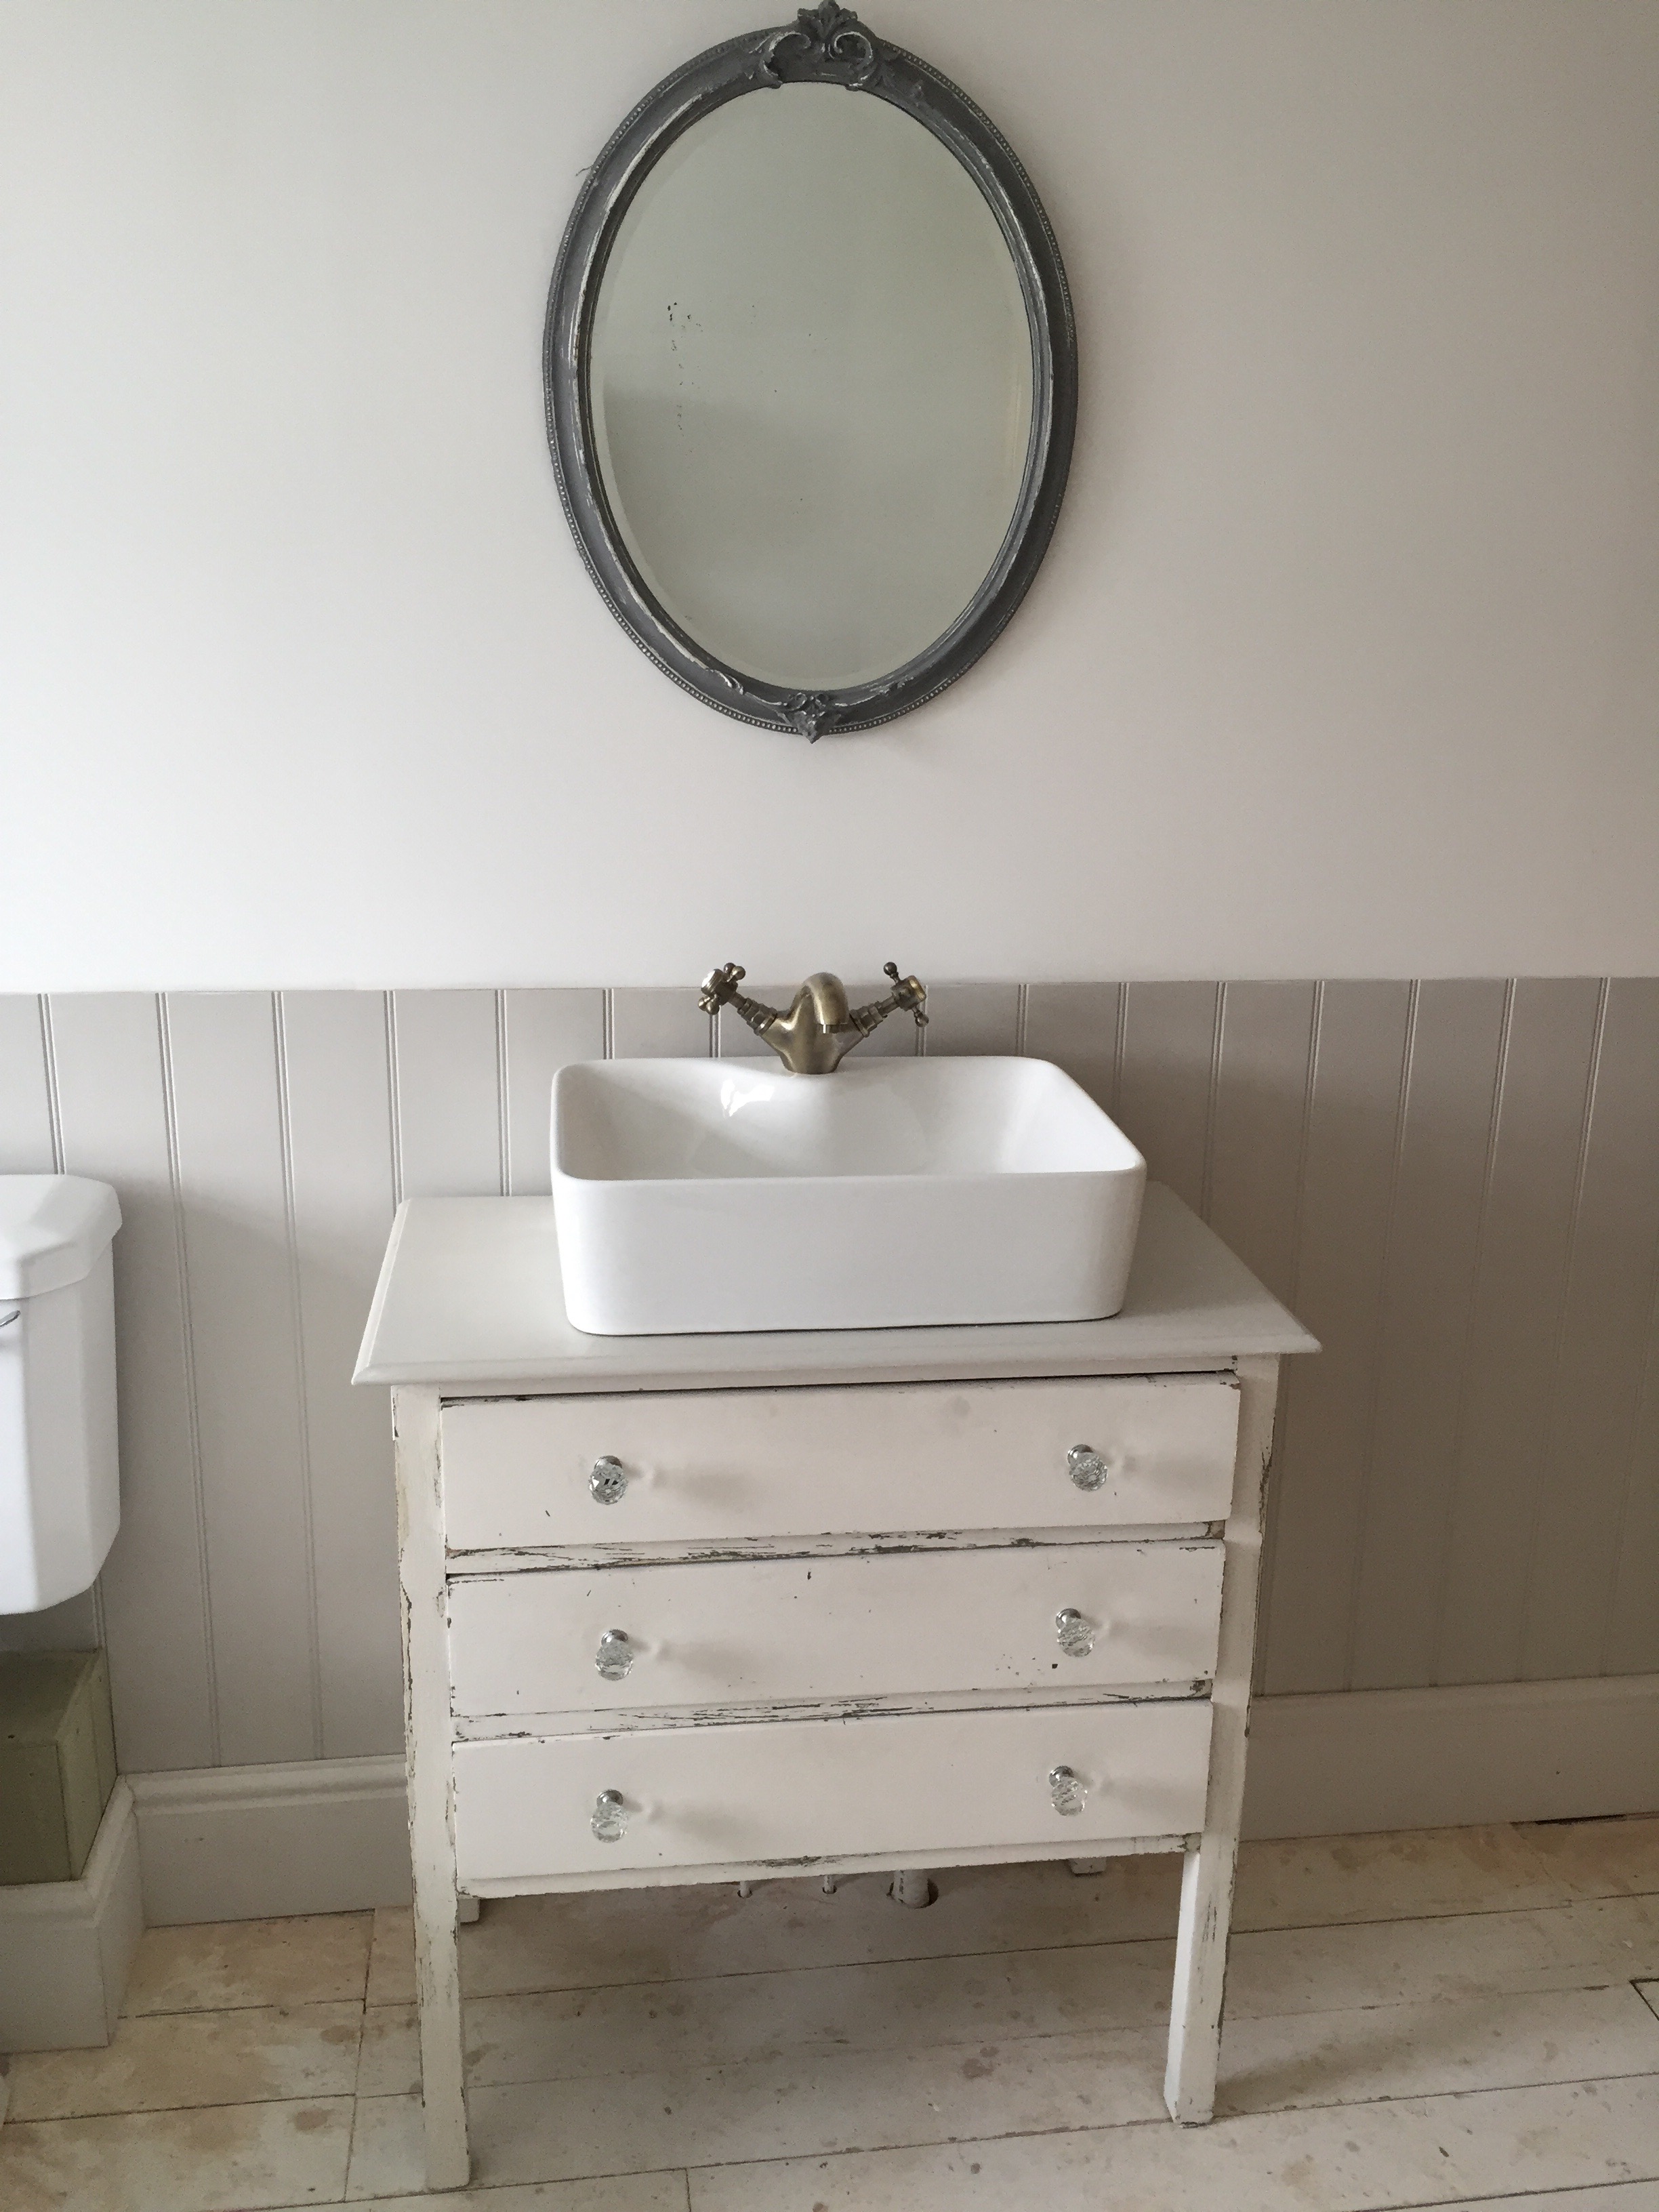
We have a lovely big acrylic roll top bath to sit under the window {I’m in two minds whether to paint it or not} and we have found a pretty antique chest of drawers which we have placed a big basin on and my mum sourced this pretty french antique mirror which looks perfect above the new vanity unit! Eventually, we will change the knobs to antique brass similar to those in my kitchen!

The bathroom will also have a big shower with waterfall shower head. So far, Chris has built the stud work for the shower area but we still need to do the plastering and we are planning on recycling one of our stripped original pine doors to use as the new airing cupboard door. We have bought a wet room glass panel for the shower but we are both feeling a little nervous about having one end of the shower exposed because on the floorboards. So, we might end up buying a glass door to finish it off! We haven’t quite decided on the tiles yet but I have a few samples to pick from; my favourite so far are a craquele glaze pale grey metro tile.

We still need to resand and paint the floorboards but until the plumbing has been finished we have to have access under the floorboards so that will be the next job. I’m on the hunt for a big antique chandelier to hang over the bath and an antique milking stool to sit by the bath for somewhere to rest a cup of tea or glass of wine!! We also need to buy a blind for the window, ideally we would have shutters like the front of the house but until we can afford them, I’m thinking a nice linen roman blind!
More soon….
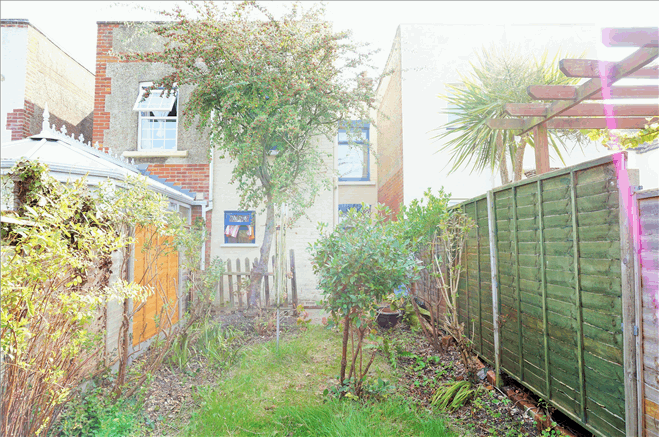
Every now and then, I get a little disheartened by the length of time its taken to complete the renovation of our victorian terrace. We’ve still got so much more to do but I need to remember how far we’ve come. So I thought I’d share some before and after snaps!
The dining room/kitchen redesign was the biggest job. When we saw the house for the first time, we knew exactly what we wanted to do to make the most of the space. We didn’t start work on the kitchen and dining room for 15 months (because of money and planning permission etc) but we did have the dining room plastered and painted just so that it was bearable to live with! We pulled back the carpet to reveal the original floorboards and sanded and waxed them. They weren’t in the best condition (lots of wood worm) so in the end when we started the work to the extension we had to pull them up and put down limestone tiles instead. We also ripped out the green tiled fireplace to reveal the lovely big brick arch and left it exposed.


We lived with this kitchen for over a year! Sometimes I would just stand in there and cry I can’t explain how cold and awful it was! As hard as I tried, It never felt clean! Lucky for me, my parents only live down the road so we ate dinner at theirs of lot of the time!


There was a wall to enclose the staircase made from original wooden panelling with a door leading into the dining room it made the upstairs so dark so we cut the wall to open the stair case up….

The biggest task at first was getting through the million layers of wallpaper that had been put up over the years. It was so exciting revealing all the different patterns from the different eras (we have kept some of the amazing ones, I should put a scrap book together) but it took such a long time and was very tedious in a freezing house with no heating!
I still stand in the kitchen and cry haha! I still can’t believe this is actually our kitchen!! (I promise I’m not really an emotional wreck).


The living room also had the original floorboards underneath the lovely red carpet! The plasterer made a big mess of them when he plastered the house even though we told him we were planning to keep the floorboards exposed. We pulled out this horrible 1960’s tiled fireplace, we had a log burner installed and kept the exposed brick fireplace which I think makes the room lovely and cosy (the log burner is my favorite feature in the house)!


We’ve still got a long way to go! Next big job is the bathroom and replacing the bannister! That’s all for now! xx
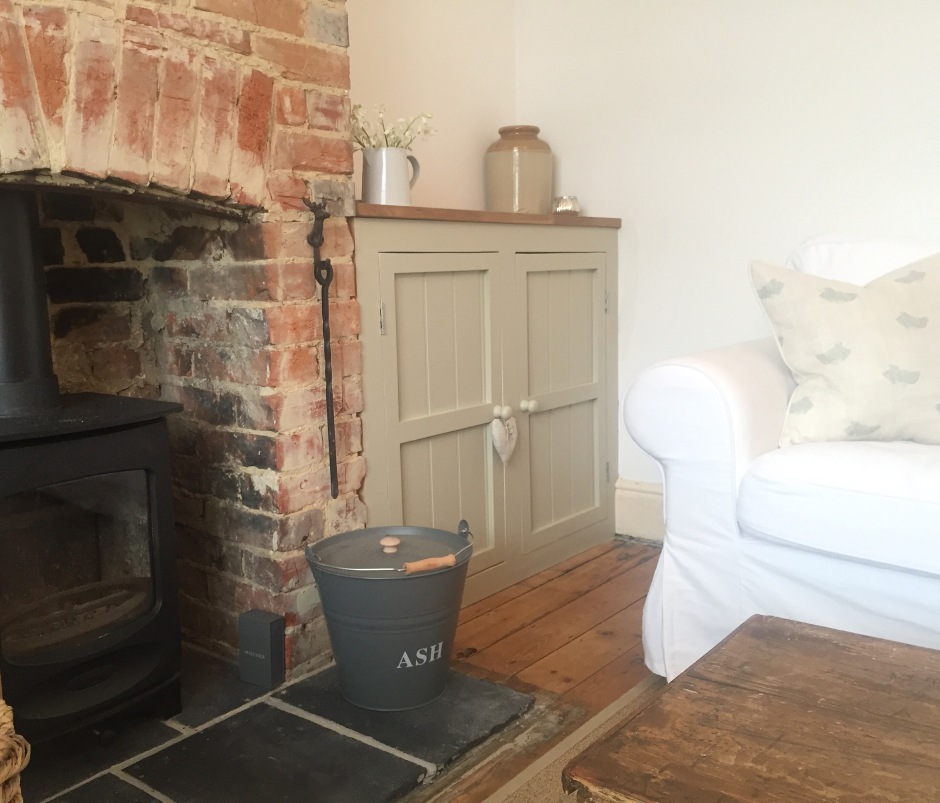
It took us a long time to think about how to make this alcove unit. It’s something we have never done before and just didn’t know where to start. So, I’m hoping this blog post will help anyone like us who had no idea where to begin! This is of course a DIY job and we’re definitely not professionals so any experts reading please comment if you have any tips!
Our little house is a mid terrace Victorian cottage which we bought as a total wreck; needing complete renovation. Our main focus was to ensure we tried to keep and reinstate some of the original features to do our Victorian home justice. Our dining room has an original alcove unit, which needs a bit of a tidy up but we were so excited that no one had got there before us and ripped it out (they are great for hiding junk quickly when friends and family visit). We wanted to do the same in the living room as one of the main problems we have with this house is the lack of storage space!
Our living room has a cottagey feel and the original unit in the dining room has cladding style doors with a frame which we wanted to try and imitate with a cottagey twist! So, the first thing we needed to do was work out how big we wanted the unit…
Our living room is quite pokey (I call it cosy) so we didn’t want the unit to come out further than the fire place. We were also conscious that our sofa would be quite close to the unit so we didn’t want it too tall which would feel strange and enclosing when sitting on the sofa next to it. We also didn’t want it too short as our ceilings are tall and we are undecided about whether to have shelves above so it might look a bit pathetic. So, to work out the perfect height we used the very complex calculation; just tall enough to place a cup of tea on the top comfortably whilst sitting on the sofa!!
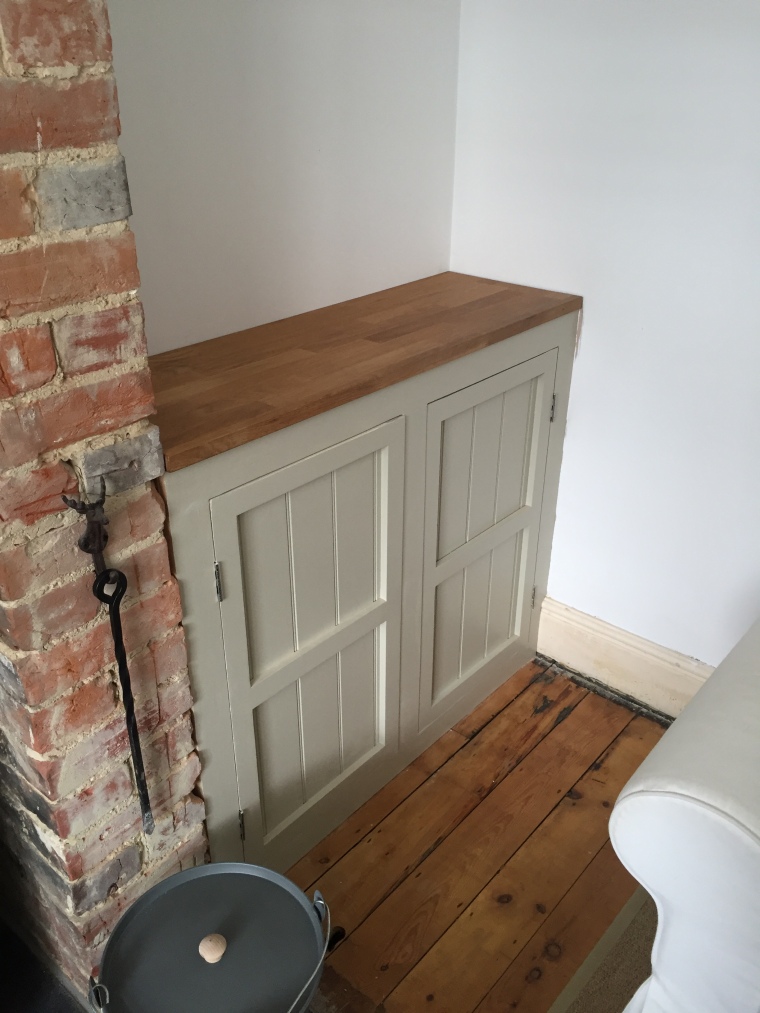
We used pine batons and whitewood PSE to create the frame; it was always our plan to paint the unit so we didn’t need to use expensive fancy materials. We wanted to create the illusion that the unit had a box frame with two doors sitting inside. So, to fix the ‘box frame’ we used batons on the floor and against the walls (hidden inside) to attach the whitewood PSE frame too….
We then built the frame ready to attach to the batons (by the way, when I say ‘we’ I mean Chris). To create the centre piece we used a pocket hole jig to screw the pieces together. We made sure the two openings were of course the same size so that we could fit two little doors. I then filled in all the joins with wood filler to finish it off neatly.
To make the doors, we used the remaining batons to create the frame; again, we used the pocket hole jig to secure together. We wanted a baton running through the middle of the frame to reinforce the flimsy tongue and grove panel which would be nailed to the back of the frame. In hindsight we probably should have used tongue and groove cladding rather than panelling as its stronger!


We secured the hinges and painted the doors and frame using Farrow and Ball Old White (we obviously primed the wood first). The knobs were simple small pine knobs from homebase which we painted to match the unit.
We finished it off with a solid oak top; this was cut to size from a solid oak coffee table! We knew we wanted an oak top but the cheapest we could find was about £200 cut to size so instead we searched for a second hand oak cut off and after weeks of searching my mum found the coffee table on good old gumtree for a bargain £40!


So, I have been completely useless over the last couple of months. Although, I think I have a good excuse…. WE’RE ENGAGED!! So out with ‘Country Homes and Interiors’ mag and in with ‘Brides’! On a serious note, so much has been happening I just can’t keep up with myself! The fiancé has moved home, The kitchen extension is complete (finally!), we have now started work on the bathroom renovation and we have almost set a date for the wedding…. aaannnnddd breath.
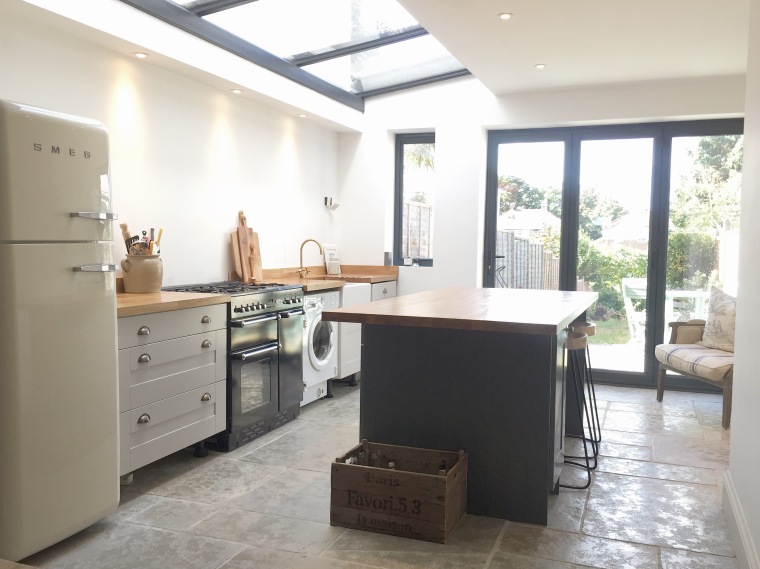
Here is the finished kitchen…
I can’t believe we have an island!! This is the part of the kitchen that excites me the most. We designed and constructed the island ourselves, we used standard floor units on one side and a narrow floor unit on the opposite to create an ‘L’ shape. The idea of this, was so that we could have two areas around the island to sit and the bar stools would tuck nice and neatly into the ‘L’. The oak worktop sits on top to hide the ‘L’ and makes the most of the space in the kitchen. We wanted the island to be a feature in the room and so decided that the cupboards should be a contrasting colour to the other kitchen units. We chose Farrow and Ball Downpipe as we thought it would match the anthracite grey door and windows. We fit tongue and groove cladding to both ends of the island as I was conscious I wanted to keep the period feel to the room and not make it too contemporary. We chose cladding rather than tongue and groove panels as it’s more substantial.


My builder tried to put us off having an island. He felt it would take up too much room in the kitchen and we wouldn’t use it much as we have such a big dining room; he was so wrong. I’m not going to pretend I wasn’t nervous about designing a kitchen for the first time in my life and I was concerned that the island was going to be too big. I can honestly say, its perfect; I wouldn’t want it any bigger or smaller! I found the perfect bar stools to compliment the island at a bargain from Homesense!
As for the rest of the kitchen; we still need to put up a shelf which will run along the wall above the kitchen units but I’m struggling to find the perfect brackets at the moment!
We managed to squeeze in a tiny little cloakroom in the new extension which we absolutely love but when I say tiny, I mean we couldn’t fit a toilet and sink in there comfortably. So, my clever mum came up with the genius idea to build a tongue and groove unit for the sink to sit on top and the toilet to back up against. I will write a separate post on our small but perfectly formed little cloakroom, so watch this space.

It has been one of the most stressful things I have ever done but it was worth it in the end and it is definitly the kitchen I have always dreamed of….
A British Interior and Lifestyle Journal
A daily selection of the best content published on WordPress, collected for you by humans who love to read.
The Art and Craft of Blogging
The latest news on WordPress.com and the WordPress community.
